This page is part of archived documentation for openHAB 3.1. Go to the current stable version
# Xiaomi Mi Smart Home Binding

This binding allows your openHAB to communicate with the Xiaomi Smart Home Suite. It consists of devices communicating over a ZigBee network with a ZigBee - WiFi gateway.
The devices are very affordable and you can get them from your favourite Chinese markets like AliExpress (opens new window) or GearBest (opens new window). The sensors run on a coin cell battery for over a year.
After setup, you can disconnect the gateway from the internet to keep your sensor information private.
Please note that using the Xiaomi gateway with openHAB requires enabling the developer mode and that multiple user reports suggest that it is no longer possible. Zigbee2Mqtt provides an alternative method to integrate Xiaomi devices.
# Supported devices
| Device | Picture |
|---|---|
| Gateway v2 (with radio support) or v3 | 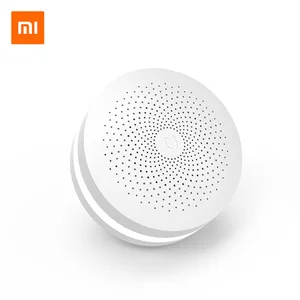 |
| Mijia Temperature and Humidity Sensor | 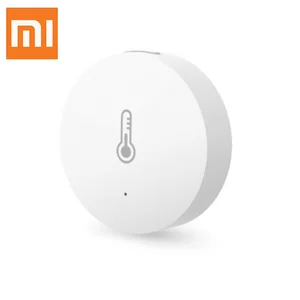 |
| Aqara Temperature, Humidity and Pressure Sensor | 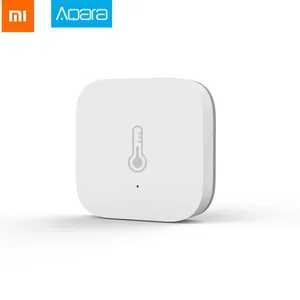 |
| Mijia Door/Window Sensor |  |
| Aqara Door/Window Sensor |  |
| Mijia Human Body Sensor | 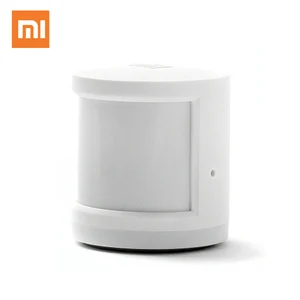 |
| Aqara Motion Sensor (with light intensity support) |  |
| Smart Socket (Zigbee version) | 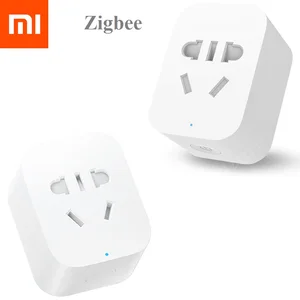 |
| Magic Cube Controller | 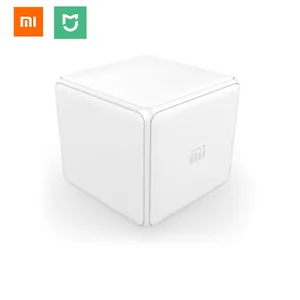 |
| Aqara Magic Cube Controller |  |
| Aqara Vibration Sensor | 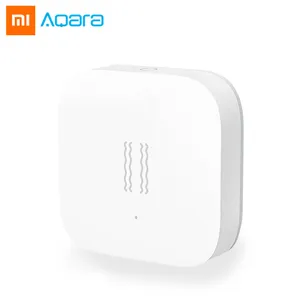 |
| Mijia Wireless Switch |  |
| Aqara Wireless Switch |  |
| Aqara Wireless Switch (with acceleration sensor) |  |
| Aqara Wall Switch (1 & 2 Button / With or Without Neutral Line) |  |
| Aqara Wireless Light Control (1 & 2 Button) | 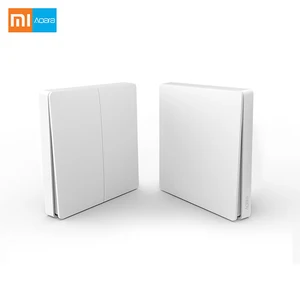 |
| Aqara Curtain Motor |  |
| Aqara Water Leak Sensor |  |
| Honeywell Gas Detector |  |
| Honeywell Smoke Detector |  |
| Aqara Fingerprint & Keyless Card & PIN Lock |  |
# Setup
Install the binding
Is your gateway already configured to connect to your WiFi? If not:
1.  Install MiHome app from [Google Play](https://play.google.com/store/apps/details?id=com.xiaomi.smarthome) or [AppStore](https://itunes.apple.com/app/mi-home-xiaomi-for-your-smarthome/id957323480) (your phone may need to be changed to English language first)
2.  In the app create a Mi Home account and make sure to set your region to Mainland (China) under Settings -> Locale
3.  If asked, do NOT update your gateway to the latest firmware (note that update window may pop up sequentially).  If you update, you may not be able to access the developer mode below.
Enable developer mode of your gateway:
1.  Select your Gateway in the MiHome app
2.  Go to the "..." menu on the top right corner and click "About"
3.  You now see two options "Smart Home Kit Forum" and "Gameplay Tutorial". Tap 5 times below the "Gameplay Tutorial" in the empty space (not the button itself) until you enable developer mode
4.  You should now have 2 extra options listed: `wireless communication protocol` and `hub info`, it may appear in Chinese
5.  Choose `wireless communication protocol`
6.  Tap the toggle switch to enable WiFi functions. Note down the developer key (aka password), something like: 91bg8zfkf9vd6uw7
7.  Make sure you hit the OK button (to the right of the cancel button) to save your changes
8.  Now update the gateway to the latest firmware
Enable developer mode of your gateway (legacy app):
1.  Select your Gateway in the MiHome app
2.  Go to the "..." menu on the top right corner and click "About"
3.  Tap the version number "Plug-in version : 2.XX.X" at the bottom of the screen repeatedly until you enable developer mode
4.  You should now have 2 extra options listed: `wireless communication protocol` and `hub info`
5.  Choose `wireless communication protocol`
6.  Tap the toggle switch to enable WiFi functions. Note down the developer key (aka password), something like: 91bg8zfkf9vd6uw7
7.  Make sure you hit the OK button (to the right of the cancel button) to save your changes
8.  Now update the gateway to the latest firmware
In openHAB you should now be able to discover the Xiaomi Gateway
From now on you don't really need the app anymore. Only if you want to update the gateway firmware or if you want to add devices (see below). But adding devices can also be done without the app (see below)
Enter the previously noted developer key in openHAB Administration -> Settings -> Things -> Xiaomi Gateway -> Edit -> Developer Key. Save (This is required if you want to be able to send controls to the devices like the light of the gateway)
# Connecting devices to the gateway
There are three ways of connecting supported devices to the gateway:
Online - within the MiHome App
Offline - manual
- Click 3 times on the Gateway's button
- Gateway will flash in blue and you will hear female voice in Chinese, you have 30 seconds to include your new device
- Place the needle into the sensor and hold it for at least 3 seconds
- You will hear confirmation message in Chinese
- The device appears in openHAB thing Inbox
With the binding
- After adding the gateway make sure you have entered the right developer key
- In the UI, go to your Inbox and trigger a discovery for the binding
- The gateway flashes in blue and you hear a female voice in Chinese, you have 30 seconds to include your new device
- Follow the instructions for your device to pair it to the gateway
- You will hear a confirmation message in Chinese
- The device appears in openHAB thing Inbox
Hints:
If you don't want to hear the Chinese voice every time, you can disable it by setting the volume to minimum in the MiHome App (same for the blinking light)
The devices don't need an Internet connection to be working after you have set up the developer mode BUT you will not be able to connect to them via App anymore - easiest way is to block their outgoing Internet connection in your router and enable it later, when you want to check for updates etc. This will ensure that your smart home data stays only with you!
# Removing devices from the gateway
If you remove a Thing it will also trigger the gateway to unpair the device. It will only reappear in your Inbox, if you connect it to the gateway again. Just follow the instructions in "Connecting devices to the gateway".
# Network configuration
- The binding requires port
9898to not be used by any other service on the system. - Make sure multicast traffic is correctly routed between the gateway and your openHAB instance
- To correctly receive multicast traffic, when your openHAB machine is using multiple network interfaces, you might need to configure the optional
interfaceproperty on theBridgeThing, like so:
Bridge mihome:bridge:f0b429XXXXXX "Xiaomi Gateway" [ ..., interface="eth0", ... ] {
# Configuration examples
# xiaomi.things:
Bridge mihome:bridge:f0b429XXXXXX "Xiaomi Gateway" [ serialNumber="f0b429XXXXXX", ipAddress="192.168.0.3", port=9898, key="XXXXXXXXXXXXXXXX" ] {
  Things:
    gateway f0b429XXXXXX "Xiaomi Mi Smart Home Gateway" [itemId="f0b429XXXXXX"]
    sensor_ht 158d0001XXXXXX "Xiaomi Temperature Sensor" [itemId="158d0001XXXXXX"]
    sensor_weather_v1 158d0001XXXXXX "Xiaomi Aqara Temp, Hum and Press Sensor" [itemId="158d0001XXXXXX"]
    sensor_motion 158d0001XXXXXX "Xiaomi Motion Sensor" [itemId="158d0001XXXXXX"]
    sensor_plug 158d0001XXXXXX "Xiaomi Plug" [itemId="158d0001XXXXXX"]
    sensor_magnet 158d0001XXXXXX "Xiaomi Door Sensor" [itemId="158d0001XXXXXX"]
    sensor_switch 158d0001XXXXXX "Xiaomi Mi Wireless Switch" [itemId="158d0001XXXXXX"]
    86sw2 158d0001XXXXXX "Aqara Wireless Wall Switch" [itemId="158d0001XXXXXX"]
}
# xiaomi.items:
// Replace <GwID> with itemId of gateway from Things file
// Replace <ID> with itemId of item from Things file
// Gateway
Switch Gateway_LightSwitch <light> { channel="mihome:gateway:<GwID>:<ID>:brightness" }
Dimmer Gateway_Brightness <dimmablelight> { channel="mihome:gateway:<GwID>:<ID>:brightness" }
Color Gateway_Color <rgb> { channel="mihome:gateway:<GwID>:<ID>:color" }
Dimmer Gateway_ColorTemperature <heating> { channel="mihome:gateway:<GwID>:<ID>:colorTemperature" }
Number Gateway_AmbientLight <sun> { channel="mihome:gateway:<GwID>:<ID>:illumination" }
Number Gateway_Sound <soundvolume-0> { channel="mihome:gateway:<GwID>:<ID>:sound" }
Switch Gateway_SoundSwitch <soundvolume_mute> { channel="mihome:gateway:<GwID>:<ID>:enableSound" }
Dimmer Gateway_SoundVolume <soundvolume> { channel="mihome:gateway:<GwID>:<ID>:volume" }

// Temperature and Humidity Sensor
Number:Temperature HT_Temperature <temperature> { channel="mihome:sensor_ht:<GwID>:<ID>:temperature" }
Number:Dimensionless HT_Humidity <humidity> { channel="mihome:sensor_ht:<GwID>:<ID>:humidity" }
Number HT_Battery <battery> { channel="mihome:sensor_ht:<GwID>:<ID>:batteryLevel" }
Switch HT_BatteryLow <energy> { channel="mihome:sensor_ht:<GwID>:<ID>:lowBattery" }

// Aqara Temperature, Humidity and pressure Sensor
Number:Temperature HTP_Temperature <temperature> { channel="mihome:sensor_weather_v1:<GwID>:<ID>:temperature" }
Number:Dimensionless HTP_Humidity <humidity> { channel="mihome:sensor_weather_v1:<GwID>:<ID>:humidity" }
Number:Pressure HTP_Pressure <pressure> { channel="mihome:sensor_weather_v1:<GwID>:<ID>:pressure" }
Number HTP_Battery <battery> { channel="mihome:sensor_weather_v1:<GwID>:<ID>:batteryLevel" }
Switch HTP_BatteryLow <energy> { channel="mihome:sensor_weather_v1:<GwID>:<ID>:lowBattery" }

// Mijia & Aqara Door/Window Sensor
Contact WindowSwitch_Status <window>  { channel="mihome:sensor_magnet:<GwID>:<ID>:isOpen" }
// minimum 30 seconds
Number WindowSwitch_AlarmTimer <clock> { channel="mihome:sensor_magnet:<GwID>:<ID>:isOpenAlarmTimer" }
DateTime WindowSwitch_LastOpened "[%1$tY-%1$tm-%1$td  %1$tH:%1$tM]" <clock-on> { channel="mihome:sensor_magnet:<GwID>:<ID>:lastOpened" }
Number WindowSwitch_Battery <battery> { channel="mihome:sensor_magnet:<GwID>:<ID>:batteryLevel" }
Switch WindowSwitch_BatteryLow <energy> { channel="mihome:sensor_magnet:<GwID>:<ID>:lowBattery" }

// Mijia Motion Sensor
Switch MotionSensor_MotionStatus <motion>  { channel="mihome:sensor_motion:<GwID>:<ID>:motion" }
// minimum 5 seconds - remember that the sensor only triggers every minute to save energy
Number MotionSensor_MotionTimer <clock> { channel="mihome:sensor_motion:<GwID>:<ID>:motionOffTimer" }
DateTime MotionSensor_LastMotion "[%1$tY-%1$tm-%1$td  %1$tH:%1$tM]" <clock-on> { channel="mihome:sensor_motion:<GwID>:<ID>:lastMotion" }
Number MotionSensor_Battery <battery> { channel="mihome:sensor_motion:<GwID>:<ID>:batteryLevel" }
Switch MotionSensor_BatteryLow <energy> { channel="mihome:sensor_motion:<GwID>:<ID>:lowBattery" }

// Aqara Motion Sensor
Switch MotionSensor_MotionStatus <motion>  { channel="mihome:sensor_motion_aq2:<GwID>:<ID>:motion" }
// minimum 5 seconds - the sensor only triggers once every minute to save energy
Number MotionSensor_MotionTimer <clock> { channel="mihome:sensor_motion_aq2:<GwID>:<ID>:motionOffTimer" }
DateTime MotionSensor_LastMotion "[%1$tY-%1$tm-%1$td  %1$tH:%1$tM]" <clock-on> { channel="mihome:sensor_motion_aq2:<GwID>:<ID>:lastMotion" }
Number MotionSensor_Battery <battery> { channel="mihome:sensor_motion_aq2:<GwID>:<ID>:batteryLevel" }
Switch MotionSensor_BatteryLow <energy> { channel="mihome:sensor_motion_aq2:<GwID>:<ID>:lowBattery" }
Number MotionSensor_Lux "LUX [%.1f]" <sun> { channel="mihome:sensor_motion_aq2:<GwID>:<ID>:illumination" }

// Smart Socket
Switch Plug_Switch <switch> { channel="mihome:sensor_plug:<GwID>:<ID>:power" }
Switch Plug_Active <switch> { channel="mihome:sensor_plug:<GwID>:<ID>:inUse" }
Number Plug_Power <energy> { channel="mihome:sensor_plug:<GwID>:<ID>:loadPower" }
Number Plug_Consumption <line-incline> { channel="mihome:sensor_plug:<GwID>:<ID>:powerConsumed" }

// Mijia & Aqara Cube Controller - see "xiaomi.rules" for action triggers
DateTime Cube_LastAction "[%1$tY-%1$tm-%1$td  %1$tH:%1$tM]" <clock-on> { channel="mihome:sensor_cube:<GwID>:<ID>:lastAction" }
Number:Angle Cube_RotationAngle { channel="mihome:sensor_cube:<GwID>:<ID>:rotationAngle" }
Number:Time Cube_RotationTime { channel="mihome:sensor_cube:<GwID>:<ID>:rotationTime" }
Number Cube_Battery <battery> { channel="mihome:sensor_cube:<GwID>:<ID>:batteryLevel" }
Switch Cube_BatteryLow <energy> { channel="mihome:sensor_cube:<GwID>:<ID>:lowBattery" }

// Aqara Smart Motion Sensor - see "xiaomi.rules" for action triggers
DateTime Vibration_LastAction "[%1$tY-%1$tm-%1$td  %1$tH:%1$tM]" <clock-on> { channel="mihome:sensor_vibration:<GwID>:<ID>:lastAction" }
Number Vibration_TiltAngle { channel="mihome:sensor_vibration:<GwID>:<ID>:tiltAngle" }
Number Vibration_CoordinateX { channel="mihome:sensor_vibration:<GwID>:<ID>:coordinateX" }
Number Vibration_CoordinateY { channel="mihome:sensor_vibration:<GwID>:<ID>:coordinateY" }
Number Vibration_CoordinateZ { channel="mihome:sensor_vibration:<GwID>:<ID>:coordinateZ" }
Number Vibration_BedActivity { channel="mihome:sensor_vibration:<GwID>:<ID>:bedActivity" }
Number Vibration_Battery <battery> { channel="mihome:sensor_vibration:<GwID>:<ID>:batteryLevel" }
Switch Vibration_BatteryLow <energy> { channel="mihome:sensor_vibration:<GwID>:<ID>:lowBattery" }

// Mijia & Aqara Wireless Switch - see "xiaomi.rules" for action triggers
Number Switch_Battery <battery> { channel="mihome:sensor_switch:<GwID>:<ID>:batteryLevel" }
Switch Switch_BatteryLow <energy> { channel="mihome:sensor_switch:<GwID>:<ID>:lowBattery" }

// Aqara Wirelss Light Control (1 Button) - see "xiaomi.rules" for action triggers
Number AqaraSwitch1_Battery <battery> { channel="mihome:86sw1:<GwID>:<ID>:batteryLevel" }
Switch AqaraSwitch1_BatteryLow <energy> { channel="mihome:86sw1:<GwID>:<ID>:lowBattery" }

// Aqara Wirelss Light Control (2 Button) - see "xiaomi.rules" for action triggers
Number AqaraSwitch2_Battery <battery> { channel="mihome:86sw2:<GwID>:<ID>:batteryLevel" }
Switch AqaraSwitch2_BatteryLow <energy> { channel="mihome:86sw2:<GwID>:<ID>:lowBattery" }

// Aqara Wall Switch (1 Button)
Switch AqaraWallSwitch <switch> { channel="mihome:ctrl_neutral1:<GwID>:<ID>:ch1" }

// Aqara Wall Switch (2 Button)
Switch AqaraWallSwitch1 <switch> { channel="mihome:ctrl_neutral2:<GwID>:<ID>:ch1" }
Switch AqaraWallSwitch2 <switch> { channel="mihome:ctrl_neutral2:<GwID>:<ID>:ch2" }

// Aqara Wall Switch (1 Button & without neutral line)
Switch AqaraWallSwitch <switch> { channel="mihome:ctrl_ln1:<GwID>:<ID>:ch1" }

// Aqara Wall Switch (2 Button & without neutral line)
Switch AqaraWallSwitch1 <switch> { channel="mihome:ctrl_ln2:<GwID>:<ID>:ch1" }
Switch AqaraWallSwitch2 <switch> { channel="mihome:ctrl_ln2:<GwID>:<ID>:ch2" }

// Aqara Curtain Motor
Rollershutter CurtainMotorControl <blinds> { channel="curtain:<GwID>:<ID>:curtainControl" }
# xiaomi.rules:
rule "Mijia & Aqara Wireless Switch"
when
    Channel "mihome:sensor_switch:<GwID>:<ID>:button" triggered
then
    var actionName = receivedEvent.getEvent()
    switch(actionName) {
        case "SHORT_PRESSED": {
            <ACTION>
        }
        case "DOUBLE_PRESSED": {
            <ACTION>
        }
        case "LONG_PRESSED": {
            <ACTION>
        }
        case "LONG_RELEASED": {
            <ACTION>
        }
    }
end

rule "Mijia & Aqara Cube Controller"
when
    Channel 'mihome:sensor_cube:<GwID>:<ID>:action' triggered
then
    var actionName = receivedEvent.getEvent()
    switch(actionName) {
        case "MOVE": {
            <ACTION>
        }
        case "ROTATE_RIGHT": {
            <ACTION>
        }
        case "ROTATE_LEFT": {
            <ACTION>
        }
        case "FLIP90": {
            <ACTION>
        }
        case "FLIP180": {
            <ACTION>
        }
        case "TAP_TWICE": {
            <ACTION>
        }
        case "SHAKE_AIR": {
            <ACTION>
        }
        case "FREE_FALL": {
            <ACTION>
        }
        case "ALERT": {
            <ACTION>
        }
    }
end

rule "Aqara Smart Motion Sensor"
when
    Channel 'mihome:sensor_vibration:<GwID>:<ID>:action' triggered
then
    var actionName = receivedEvent.getEvent()
    switch(actionName) {
        case "VIBRATE": {
            <ACTION>
        }
        case "TILT": {
            <ACTION>
        }
        case "FREE_FALL": {
            <ACTION>
        }
    }
end


rule "Mijia & Aqara Motion Sensor"
when
    Item MotionSensor_MotionStatus changed
then
    if (MotionSensor_MotionStatus.state == ON) {
        <ACTION>
    } else {
        <ACTION>
    }
end

rule "Mijia & Aqara Door/Window Sensor"
when
    Item WindowSwitch_Status changed
then
    if (WindowSwitch_Status.state == OPEN) {
        <ACTION>
    } else {
        <ACTION>
    }
end

rule "Mijia & Aqara Door/Window Sensor - Window is open for longer than WindowSwitch_AlarmTimer"
when
    Channel "mihome:sensor_magnet:<GwID>:<ID>:isOpenAlarm" triggered ALARM
then
    <ACTION>
end

rule "Aqara Wirelss Light Control (1 Button)"
when
    Channel "mihome:86sw1:<GwID>:<ID>:ch1" triggered SHORT_PRESSED
then
    <ACTION>
end

rule "Aqara Wirelss Light Control (2 Button)"
when
    Channel "mihome:86sw2:<GwID>:<ID>:ch1" triggered SHORT_PRESSED
then
    <ACTION>
end

rule "Aqara Wirelss Light Control (2 Button)"
when
    Channel "mihome:86sw2:<GwID>:<ID>:ch2" triggered SHORT_PRESSED
then
    <ACTION>
end

rule "Aqara Wirelss Light Control (2 Button)"
when
    Channel "mihome:86sw2:<GwID>:<ID>:dual_ch" triggered SHORT_PRESSED
then
    <ACTION>
end

// This rule is applicable for every battery powered sensor device
rule "Xiaomi Motion Sensor Low Battery"
when
    Item MotionSensor_BatteryLow changed to ON
then
    <ACTION>
end

rule "Play quiet knock-knock ringtone with the Xiaomi Gateway"
when
    // Item ExampleSwitch changed to ON
then
    Gateway_SoundVolume.sendCommand(2)
    Gateway_Sound.sendCommand(11)
    Thread::sleep(2000) /* wait for 2 seconds */
    Gateway_Sound.sendCommand(10000)
    Gateway_SoundVolume.sendCommand(0)
end
# xiaomi.sitemap:
sitemap xiaomi label="Xiaomi" {
    // Example for selection of predefined sound file - you can also upload your own files with the official MiHome App and play them!
	Frame {
        ...

        // Selection for Xiaomi Gateway Sounds
        // 10000 is STOP
        // >10001 are own sounds you uploaded to the gateway
        Selection item=Gateway_Sound mappings=[ 0="police car 1",
                                                1="police car 2",
                                                2="accident",
                                                3="countdown",
                                                4="ghost",
                                                5="sniper rifle",
                                                6="battle",
                                                7="air raid",
                                                8="bark",
                                                10="doorbell",
                                                11="knock at a door",
                                                12="amuse",
                                                13="alarm clock",
                                                20="mimix",
                                                21="enthusuastic",
                                                22="guitar classic",
                                                23="ice world piano",
                                                24="leisure time",
                                                25="child hood",
                                                26="morning stream liet",
                                                27="music box",
                                                28="orange",
                                                29="thinker"]
    }
}
# Handling unsupported devices
The Xiaomi ecosystem grows at a steady rate. So there is a good chance that in the future even more devices get added to the suite. This section describes, how to get the necessary information to support new device types. While a device is not supported yet, it is still possible to access its information.
Make sure you have connected your gateway to openHAB and the communication is working.
# Connect the new device
- Go through the normal procedure to add a device to the gateway
- The device will show up in your inbox as a new unsupported device and its model name
- Add the device as a new thing of type "basic device", now you have different channels to receive and send messages from/to the device
- raw messages from the device
- the data from the four different type of messages (see their details in the next chapter)
- parameters you can send to the device
# Gather information about the new device for future support
The devices send different types of messages to the gateway. You have to capture as many of them as possible, so that the device is fully supported in the end.
- Heartbeat (usually transmitted every 60 minutes)
- Report (device reports new sensor or status values)
- Read ACK (binding refreshes all sensor values after a restart of openHAB)
- Write ACK (device has received a command) not available for sensor-only devices
# Open a new issue or get your hands dirty
Every little help is welcome, be part of the community! Post an issue in the GitHub repository with as much information as possible about the new device:
- brand and link to device description
- model name
- content of all the different message types
Or implement the support by yourself and submit a pull request.
# Handle the message contents of a basic device thing with items
You can access the whole message contents of the basic device thing with String items. That way you can make use of your device, even if it is not supported yet! The following examples are a demonstration, where a basic device thing for the gateway was manually added.
String Gateway_Raw { channel="mihome:basic:xxx:lastMessage" }
String Gateway_Heartbeat { channel="mihome:basic:xxx:heartbeatMessage" }
Example for a raw message from the gateway: {"cmd":"heartbeat","model":"gateway","sid":"xxx","short_id":"0","token":"xxx","data":"{\"ip\":\"192.168.0.124\"}"}
Example for the same message from the heartbeat channel - only the data is returned: {"ip":"192.168.0.124"}
These messages are in JSON format, which also gives you the ability to parse single values.
Example for the retrieved IP from the heartbeat message and transformed with JSONPATH transformation: String Gateway_IP {channel="mihome:basic:xxx:heartbeatMessage"[profile="transform:JSONPATH", function="$.ip"]}
The item will get the value 192.168.0.124.
# Write commands to a basic device
You can write commands to devices which support it, usually all battery powered devices are not able to receive commands.
The commands have to be issued as attributes of a JSON Object, e.g. instead of writing {"attr":"value"} you have to write "attr":"value" or "channel_0":"on", "channel_1":"on" to the item.
The following example uses a rule to enable device pairing on the gateway:
mihome.items
String Gateway_Write { channel="mihome:basic:xxx:writeMessage" }
Switch Gateway_AddDevicesSwitch
mihome.rules
rule "Enable device pairing with gateway as basic device thing"
when
    Item Gateway_AddDevicesSwitch changed to ON
then
    Gateway_Write.sendCommand("\"join_permission\":\"yes\"")
end
You can also send multiple command at once:
GatewayWrite.sendCommand("\"rgb\":150000,\"join_permission\":\"yes\"")
Make sure to write numbers without quotes and strings with quotes. Also, quotes have to be escaped.
# Debugging
If you experience any unexpected behaviour or just want to know what is going on behind the scenes, you can enable debug logging. This makes possible following the communication between the binding and the gateway.
# Enable debug logging for the binding
Login to the openHAB Console (opens new window)
Enter
log:set TRACE org.openhab.binding.mihomein the console to enable full logsWhen you are done you can disable the extended logging with
log:set DEFAULT org.openhab.binding.mihomeEnter
log:tailin the console or exit the console and start viewing the logs (opens new window)
# Troubleshooting
For the binding to function properly it is very important, that your network config allows the machine running openHAB to receive multicast traffic. In case you want to check if the communication between the machine and the gateway is working, you can find some hints here.
- Set up the developer communication as described in the Setup section
# Check if your Linux machine receives multicast traffic
- Login to the Linux console
- make sure you have netcat installed
- Enter
netcat -ukl 9898 - At least every 10 seconds you should see a message coming in from the gateway which looks like
{"cmd":"heartbeat","model":"gateway","sid":"`xxx","short_id":"0","token":"xxx","data":"{\"ip\":\"`xxx\"}"}
# Multiple network interfaces
When the computer running openHAB has more than one network interface configured (typically, a VLAN for your segregated IoT devices, and the other for your regular traffic like internet, openHAB panel access, etc), it could be that openHAB will attempt to listen for Multicast traffic of the Gateway on the wrong network interface. That will prevent openHAB and netcat from receiving the messages from the Xiaomi Gateway. Within openHAB this manifests by seeing the Gateway and its devices online for a brief period after openHAB startup, after which they timeout and are shown Offline. No channel triggers from the Gateway work in this case.
In order to verify that traffic is actually received by the machine use tcpdump on each interface:
- List your network interfaces
ifconfig | grep MULTICASTorip link | grep MULTICAST - Use
tcpdump -i <interface> port 9898for each interface to verify if you receive traffic
If you already know the correct interface, or you found the correct one through tcpdump:
- Configure the
interfaceproperty of theBridgeThing with the correct name (for exampleeth0, etc)
# Check if your Windows/Mac machine receives multicast traffic
- Download Wireshark
- Start and select the network interface which is connected to the same network as the gateway
- Filter for the multicast messages with the expression
udp.dstport== 9898 && data.text - At least every 10 seconds you should see a message coming in from the gateway which looks like
{"cmd":"heartbeat","model":"gateway","sid":"`xxx","short_id":"0","token":"xxx","data":"{\"ip\":\"`xxx\"}"}
My gateway shows up in openHAB and I have added all devices, but I don't get any value updates:
- Most likely your machine is not receiving multicast messages
- Check your network config:
- Routers often block multicast - enable it
- Make sure the gateway and the machine are in the same subnet
- Try to connect your machine via Ethernet instead of Wifi
- Make sure you don't have any firewall rules blocking multicast
- If you have multiple network interfaces, try to configure the
interfaceproperty of theBridgeThing
I have connected my gateway to the network but it doesn't show up in openHAB:
- Make sure to have the developer mode enabled in the MiHome app
- Reinstall the binding
- Try to update the firmware of the gateway
- Make sure you have a supported gateway hardware
- Search the openHAB Community forum
- Contact Xiaomi support - get your gateway replaced
Nothing works, I'm frustrated and have thrown my gateway into the bin. Now I don't know what to do with all the sensors: Check out the Zigbee2Mqtt project on GitHub. It allows you to use the sensors without the gateway and get their values through MQTT. You will need some hardware to act as a gateway which is not expensive. You can find more information and a list of supported Xiaomi devices in the GitHub repository.
← Xiaomi Mi IO XmlTV →